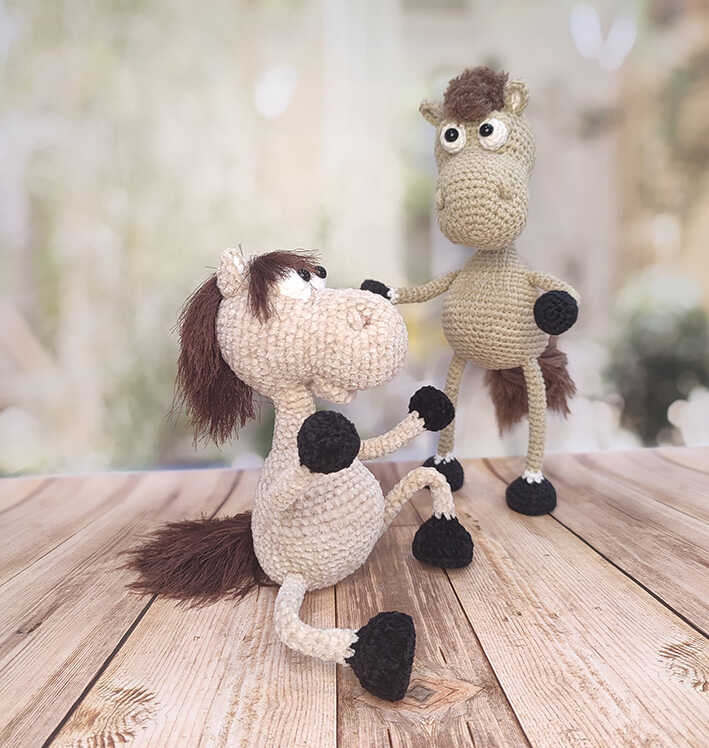
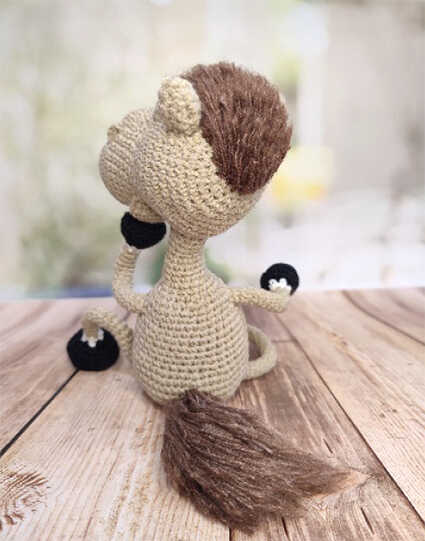
Ultimate Amigurumi Horse: Step By Step Free Crochet Guide
Designer: Yulia Knitting
VK: @yuliaknitting
Difficulty Level: Master Class
Challenge your skills with this professional equine project — let’s reach the next level today…
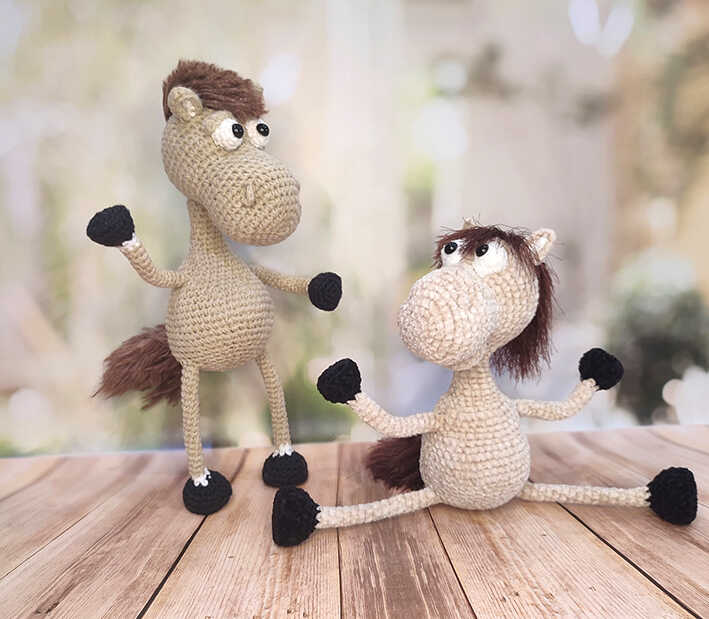
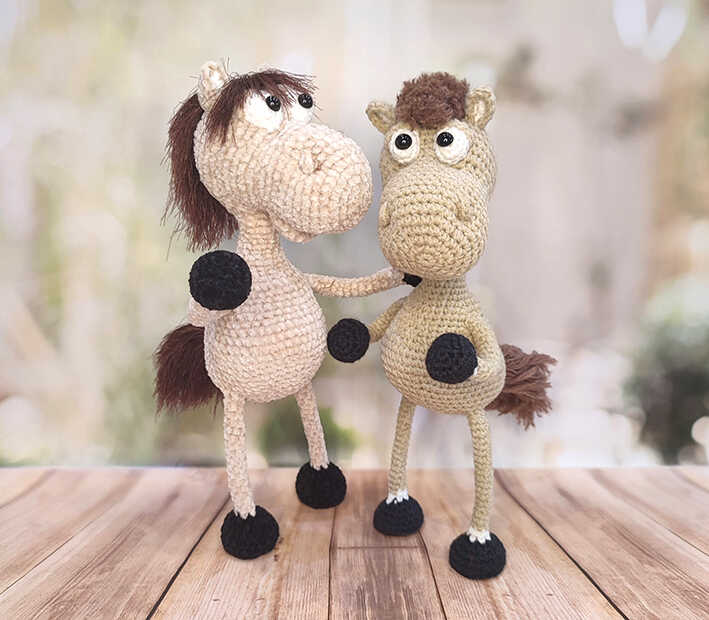
Creating a realistic horse plushie requires a high level of precision and patience. Therefore, this Difficulty Level: Master Class project provides the ultimate technical inspiration for your next DIY Crochet Gift Ideas. This character stands out among Easy Crochet Projects due to its intricate wire frame and muscle sculpting. Moreover, experienced crafters choose Low Sew Amigurumi Patterns to achieve a professional result with minimal assembly. We offer our sincere thanks to the talented Yulia Basenkova for sharing this lovely Free Pattern with us. At the end of this post, you will also discover a gallery of stunning amigurumi horse fikirleri to elevate your craft. If you want to create a high-quality horse that looks professionally made, this tutorial is a perfect place to start.
This Beginner amigurumi horse pattern is ideal for those who want to learn how to crochet amigurumi with internal support structures. The construction remains accessible because the guide uses logical steps to define the animal’s anatomy. Consequently, it serves as a Quick to Make Amigurumi for crafters who enjoy detailed, technical work. While we designed this model with Gazzal Jeans for a clean stitch finish, you can also use Velvet Yarn for a softer effect. However, remember that using plush yarn will make the final toy much larger! This versatility allows you to practice different tension styles on a single Master Class design.
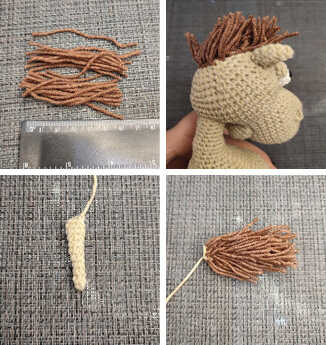
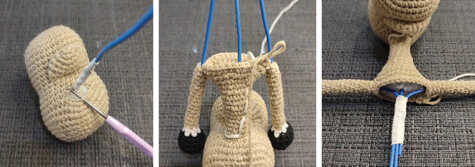
To bring this masterpiece to life, prepare a 1.5 mm crochet hook, 2 mm coated wire, and medical tape. First, follow this step by step guide to build a sturdy skeletal frame for the legs and neck. Next, use fiberfill to sculpt the muscles and clear crystal glue to secure the half-bead eyes. Then, master the muzzle details and the color transitions for the hooves and mane. Don’t forget to visit the Amigurumi Cow Free Pattern for more beginner friendly projects. Finally, assemble all the parts and admire your technical achievement. Scroll down and let’s start stitching!

Materials
• Gazzal Jeans yarn (main color + additional colors for hooves, muzzle, and eye whites)
• Half beads for eyes, 2 pcs
• Crochet hook 1.5 mm
• Clear crystal glue (Moment Crystal or similar)
• Fiberfill stuffing
• Wire 2 mm with coating, 130 cm
• Medical tape (adhesive plaster)
Abbreviations
MR – magic ring
ch – chain
sc – single crochet
inc – increase
dec – decrease
FLO – front loop only
BLO – back loop only
3 in 1 – 3 sc in one stitch
sl st – slip stitch
hdc – half double crochet
(…) x n – repeat instructions in parentheses n times
MUST-TRY JUST A HORSE AMIGURUMI FREE CROCHET PATTERN
Mouth
R1: 6 sc in MR (6)
R2: (inc) x 6 (12)
R3: (1 sc, inc) x 6 (18)
R4–5: 18 sc
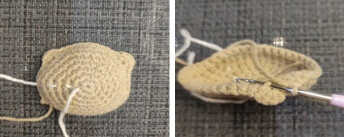
Fold the piece in half and crochet through both layers: 9 sc.
Lower Legs (2 pieces)
Hoof color.
R1: 6 sc in MR (6)
R2: (inc) x 6 (12)
R3: (1 sc, inc) x 6 (18)
R4: (2 sc, inc) x 6 (24)
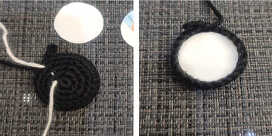
R5: BLO 24 sc (insert a cardboard disk)
R6: (2 sc, dec) x 6 (18)
R7: 18 sc (insert wire 25 cm)
R8: (1 sc, dec) x 6 (12)
R9: (dec) x 6 (6)
Change to main color.
R10–28: 6 sc (19 rounds)
Upper Legs (2 pieces)
Hoof color.
R1: 6 sc in MR (6)
R2: (inc) x 6 (12)
R3: (1 sc, inc) x 6 (18)
R4: BLO 18 sc
R5: (1 sc, dec) x 6 (12)
R6: 12 sc (insert wire 20 cm)
R7: (dec) x 6 (6)
Change to main color.
R8–23: 6 sc (16 rounds)
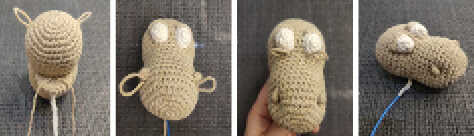
Muzzle and Head
R1: 6 sc in MR (6)
R2: (inc) x 6 (12)
R3: (1 sc, inc) x 6 (18)
R4: (2 sc, inc) x 6 (24)
R5: (3 sc, inc) x 6 (30)
R6: (4 sc, inc) x 6 (36)
R7: 36 sc
R8: 20 sc, 5 hdc in one half-loop (nostril), 10 sc, 5 hdc in one half-loop (nostril), 4 sc
R9: 20 sc, 1 sc BLO, 10 sc, 1 sc BLO, 4 sc (36)
R10: 36 sc
R11: (10 sc, dec) x 3 (33)
R12: 33 sc
R13: (9 sc, dec) x 3 (30)
R14: 4 sc, 9 sc together with mouth stitches, 17 sc (30)
R15: 30 sc
R16: 2 sc, inc, 12 sc, (2 sc, inc) x 5 (36)
R17: 1 sc, inc, 12 sc, (3 sc, inc) x 5, 2 sc (42)
R18: 10 sc, ch 8 (skip 2 base stitches), 30 sc (48)
R19: 10 sc, 8 sc along chains, 30 sc (48)
R20–21: 48 sc
R22: (6 sc, dec) x 6 (42)
R23: 42 sc
R24: (5 sc, dec) x 6 (36)
R25: (4 sc, dec) x 6 (30)
Insert frame 33 cm and stuff firmly.
R26: (3 sc, dec) x 6 (24)
R27: (2 sc, dec) x 6 (18)
R28: (1 sc, dec) x 6 (12)
R29: (dec) x 6 (6)
Eyes
Eye Whites (2 pieces)
R1: ch 3; from 2nd ch: 3 in 1; in last ch 3 in 1 (6)
R2: 1 sc, 3 in 1, 2 sc, 3 in 1, 1 sc (10)
R3: 2 sc, inc, 4 sc, inc, 2 sc (12)
Eyelids (2 pieces)
R1: ch 6, from 2nd ch: 5 sc
R2: Crochet together with eye white: 5 sc
Ears (2 pieces of each color)
R1: ch 4; from 2nd ch: 2 sc, 3 in 1, 2 sc (7). ch, turn
R2: 3 sc, 3 in 1, 3 sc (9)
Place main and contrast color pieces together and sc around:
4 sc, inc, 4 sc.
Body
Attach yarn to the opening at the back of the head (the ch-8 from Round 18 of the head).
R1: 4 sc along chains, 2 sc on sides, 4 sc along chains (10)
R2–5: 10 sc
R6: (4 sc, inc) x 2 (12)
R7–8: 12 sc
R9: (5 sc, inc) x 2 (14)
R10: 14 sc
R11: (6 sc, inc) x 2 (16)
R12: (7 sc, inc) x 2 (18)
R13: (2 sc, inc) x 6 (24)
R14: (3 sc, inc) x 6 (30)
R15: 9 sc, 3 sc together with arm, 12 sc, 3 sc together with arm, 3 sc (30)
R16: 9 sc, 3 sc along arm, 12 sc, 3 sc along arm, 3 sc (30)
R17: (4 sc, inc) x 6 (36)
R18: 36 sc
R19: 18 sc, (1 sc, inc) x 3, 12 sc (39)
R20: 18 sc, (2 sc, inc) x 3, 12 sc (42)
R21: 42 sc
R22: (6 sc, inc) x 6 (48)
R23: 48 sc
R24: (2 sc, inc) x 2, 15 sc, (dec, 2 sc) x 2, dec, 14 sc (48)
R25: (3 sc, inc) x 2, 15 sc, (dec, 1 sc) x 2, dec, 13 sc (48)
R26: 48 sc
R27: 27 sc, (dec, 2 sc) x 3, 9 sc (45)
R28: 27 sc, (dec, 1 sc) x 3, 9 sc (42)
R29: 20 sc, 3 sc with leg, 14 sc, 3 sc with leg, 2 sc (42)
R30: 4 sc, dec, (5 sc, dec) x 2, 3 sc along leg, 4 sc, dec, 3 sc, dec, 3 sc, 3 sc along leg, dec (36)
R31: (1 sc, dec) x 5, 10 sc, dec, 9 sc (30)
R32: (3 sc, dec) x 6 (24)
R33: (2 sc, dec) x 6 (18)
R34: (1 sc, dec) x 6 (12)
R35: (dec) x 6 (6)
Tail
R1: 4 sc in MR (4)
R2: 4 sc
R3: inc, 3 sc (5)
R4–5: 5 sc
R6: inc, 4 sc (6)
R7–8: 6 sc
R9: inc, 5 sc (7)
Note: For a movable tail, in Round 26 of the body make an opening (ch 1, skip 1 stitch) and insert a 10 cm wire.

Copyright & Credits
The design and instructions belong to the original creator. Redistribution, copying, or publication of this pattern (in whole or in part), including translations, is not permitted without the designer’s permission. Please credit the original author when sharing finished works made from this pattern.