Best Funny Little Amigurumi Monster Free Crochet Pattern
Designer: Nika Razumovskaya
Instagram: @nika.r_
Etsy Shop: YarnlingsbyNika
Difficulty Level: Easy (Beginner-Friendly)
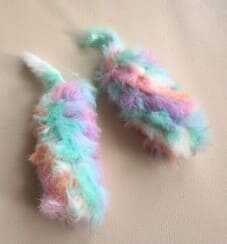
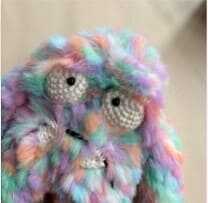
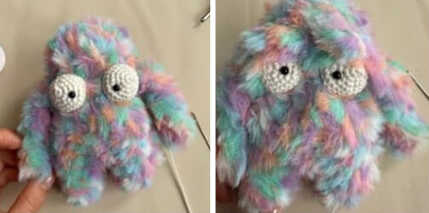
Add a splash of color to your toy collection with this adorable little beast — it is time to start your next creative mission now…
Monsters bring a sense of joy to any child’s bedroom. Therefore, they provide the ultimate inspiration for your next DIY Crochet Gift Ideas. This character stands out among Easy Crochet Projects because it features a friendly face. Moreover, the Difficulty Level: Easy makes this project perfect for stress-free crafting. We offer our sincere thanks to Nika Razumovskaya for sharing this lovely Free Pattern with us. At the end of this post, you will also discover a gallery of stunning amigurumi monster ideas. If you want to create a vibrant plush friend that is simple, this tutorial is a perfect place to start.
This Beginner amigurumi monster pattern helps you master how to crochet amigurumi quickly. The construction remains beginner-friendly because the round body is very easy to shape. Consequently, it serves as a Quick to Make Amigurumi for last-minute party favors. While we used fluffy plush yarn for a soft finish, you can also use Cotton Yarn. However, remember that using plush yarn will make the final monster much larger. In addition, this versatility allows you to choose the perfect yarn for your Low Sew Amigurumi Patterns needs easily.
To bring this trend to life, prepare your 4.5 mm and 2 mm hooks. The supplies include plush yarn for the body and cotton yarn for the eyes. First, follow this step by step guide to assemble the body and add the fiberfill. Next, use markers to track your rounds and a lighter to secure any yarn ends. Don’t forget to visit the Amigurumi Bat Free Pattern for more beginner friendly inspiration. Finally, use your scissors to trim the details and enjoy your new companion. Scroll down and let’s start stitching!

Materials:
• Some fluffy or plush yarn 100g/55-68m- 50-60g;
• A pair of safety eyes, 6 mm;
• Some cotton yarn to crochet the eyes;
• Some cotton or plush yarn to crochet the hat;
• A hook for fluffy yarn – 4.5 mm, for cotton yarn – 2 mm;
• A lighter;
• Fiberfill;
• Markers;
• Scissors;
Abbreviations:
MR- magic ring
ch- chain
sc- single crochet
dc- double crochet
dec- decrease
inc- increase
FUNNY LITTLE AMIGURUMI MONSTER: STEP BY STEP
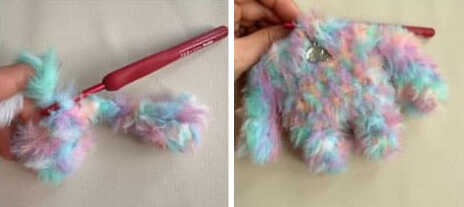
Let’s make the monster’s arms (2 pieces)
Rnd 1. sc 6 in MR (6)
Rnd 2-8. (7 rnds) sc6 (6)
Don’t stuff the arm with fiber or stuff only the hand a bit. Don’t stuff the top of the arm with fiber!
Fold in halves, sc3 in both sides. You’ll attach the arms later.
Making the Little Monster Legs (2 pieces)
Rnd 1. sc 6 in MR (6)
Rnd 2. inc1, sc5 (7)
Rnd 3. sc1, inc1, sc5 (8)
Crochet shifting sc2 along both legs.
Crochet 2 pieces. Fix and cut thread along one leg, don’t cut thread along the 2nd leg and go on crocheting the body.
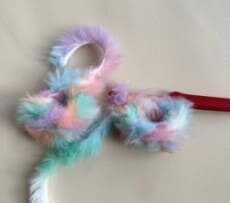
How to Crochet the Monster Body
Rnd 1. ch4, sc8 along 1 leg, sc4 along the chain, sc8 along the 2nd leg, sc4 along the chain (24)
Place the marker.
Rnd 2-8. (7 rnds) sc24 (24)
Attach he arms. Make sure they are at the sides.
If it’s necessary, shift the arms.
Rnd 9. sc3, sc3 together with the arm, sc10, sc3 together with the arm, sc5 (24)
Stuff the body with fiber.
Rnd 10. (sc2, dec1)*6 (18)
Rnd 11-13. (3 rnds) sc 18 (18)
There are 2 ways of crocheting the top of the head.
Variant 1. With ears
Crochet shifting sc to finish the work exactly at the side above the arm. Leave long tail thread. Fold the piece in halves and sew in both sides.
Fix and cut thread. Hide tail thread.
Variant 2. Round head.
Rnd 14. (sc1, dec 1)*6 (12)
Rnd 15. dec 6 (6)
Finish the work accurately. Fix and cut thread.
Eyelid details
ch13, turn the work, from the 2nd ch:
sc1, hdc1, dc3 in ch1, hdc1, sc1, sl st2, sc1, hdc1, dc3 in ch1, hdc1, sc1
Fix and cut thread.
Sew eyelids by some thin thread.
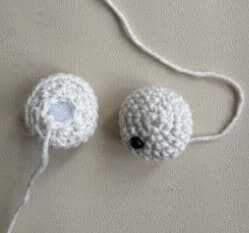
Big monster eyes (2 pieces)
Cotton thread, a hook 2 mm.
Rnd 1. sc6 in MR (6)
Rnd 2. inc6 (12)
Rnd 3. (sc1, inc1)*6 (18)
Rnd 4. (sc2, inc1)*6 (24)
Rnd 5-7. (3 rnds) sc24 (24)
Insert the eyes between 3 and 4 rnds. Fix the eye’s leg with a lighter.
Rnd 8. BLO (sc1, dec1)*8 (16)
Rnd 9. dec8 (8)
Leave long tail thread.
Stuff the eyes with fiber.
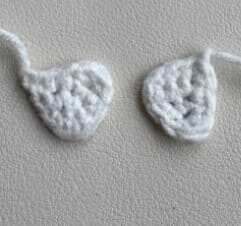
The monster’s cute teeth (2 pieces)
ch2, turn the work, fro mthe 2nd ch:
Rnd 1. sc2 (2) ch1, turn the work
Rnd 2. sc1, inc1 (3) ch1, turn the work
Rnd 3. sc3 (3)
Don’t turn the work.
Bind off (hide beginning tail thread in the process) sc3 along side edge, in the top sc (sc1, hdc1, sc1), sc3 along the 2nd side edge.
Fix thread, leave long tail thread.
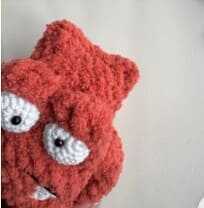
Decoration details
Sew the eyes along FLO between the arms in a short distance in between.
Sew the eyelids along the top of the eyes. Make additional stitches between the eyes.
Embroider the smile by black thread. Sew the teeth.
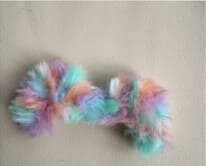
Christmas tree hat
You can take some cotton thread if you want to have a small hat.
If you take some plush yarn, the hat will be a bit bigger.
Top of the hat
Rnd 1. sc 6 in MR (6)
Rnd 2 inc6 (12)
Rnd 3-4. (2 rnds) sc12 (12)
Rnd 5. dec 6 (6)
Change thread color into green one.
Rnd 6. (sc1, inc1)*3 (9)
Stuff only the top of the Christmas tree with fiber. Then crochet in BLO.
Rnd 7. sc9 (9)
Rnd 8. (sc2, inc1)*3 (12)
Rnd 9. sc 12 (12)
Rnd 10. (sc3, inc1)*3 (15)
Rnd 11. sc15 (15)
Rnd 12. (sc4, inc1)*3 (18)
Rnd 13. sc18 (18)
Rnd 14. (sc5, inc1)*3 (21)
Rnd 15. sc21 (21)
Rnd 16. (sc6, inc1)*3 (24)
Rnd 17. sc 24 (24)
Try the hat on the head. In my case, I’ve crocheted extra rnds until required width of the hat. The biggest hat is of sc30.
Sl st 1 in next sc. Turn the work, sl st in FLO of previous rnd. Bind off the hat in spiral in FLO, crocheting (dc1,ch1) in each sc.
Leave long tail thread and fix the hat’s fold with it.
